We may earn money or products from the companies mentioned in this post.
 In this Ultimate Paintball Sniper Guide, I will discuss the gear and tactics utilized by the best paintball snipers and show you customization options for maximizing your markers effective range.
You will read about camouflage, stalking, sound and light discipline, and the utilization of cover and concealment. I will also discuss sniper hides and shot placement.
A sniper is a person who shoots from a hiding place, especially accurately and at long range. There was a time that the idea of the “paintball sniper” was laughable. Players ridiculed those who tried the skill. People said that the idea of a paintball sniper was preposterous and in a way, it was, at the time.
However, times have changed, and with it paintball technology. Rifled barrels and the Tiberius Arms First Strike Paintballs have made it possible for one shot, one kill hits at distances of well over 300 feet. Now, these are by no means true sniper rifle distances, but in the world of paintball, these distances are a game changer. Now, a thousand-dollar marker set up will not make you the greatest paintball sniper ever. Good gear and great tactics work together to create greater opportunities for the shooter.
Building your Paintball Sniper Marker:
When putting together the ultimate sniper marker, you need to consider every component as they will work together to create optimal range and accuracy.
The Foundation:
The first question that you need to ask yourself before choosing a marker is this, “how much do I want to spend?” The second question is, “round ball or first strike?” Now, a first strike compatible marker will cost you more money, but the out of the box range and accuracy is unmatched. Purchasing a first strike compatible marker will give you a solid foundation.
First Strike Rounds:
Tiberius Arms developed First Strike Paintballs (FSR) in 2009. These paintballs utilize stabilizing fins on the rear of the round. These stabilizing fins give the round a longer, straighter, and more accurate flight path. To be able to use the FSR round you need an FSR compatible marker.
Although impractical, you can load each FSR round individually in the breach of a non-FSR marker. You can accomplish this by removing the feed neck from your marker and placing the round in the breach in the correct direction. This is hard to do and not practical, especially during a dynamic paintball match.
FSR Accuracy:
The FSR can increase accuracy up to 20% and give you two times the range of normal .68 caliber paintballs. Purchasing a marker that is FSR compatible will give you an undeniable edge. The maximum range of an FSR is about 500 feet, dwarfing the 250 feet range of a .68 caliber paintball. The effective range is closer to 225 feet. I know that rounds have been lobbed farther distances, but to be a sniper, you want to your first round to hit the target for two reasons. First, you risk giving away your position by shooting multiple rounds and second, FSR rounds can be costly. You also have a limited amount in each magazine before you are out, so you have to make better decisions in the field.
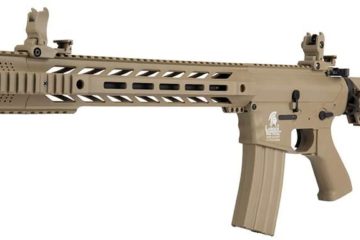
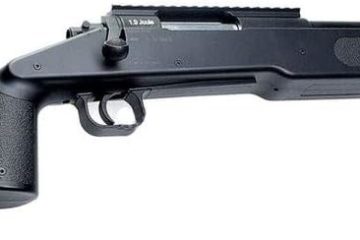
Therefore, my choice for a reliable First Strike compatible paintball sniper platform is the First Strike T15 Paintball Marker. I chose the T15 because of its reliability, it is an AR15 style platform, and its low cost compared to other FSR compatible markers. You can check Amazon.com for the latest pricing by clicking here.
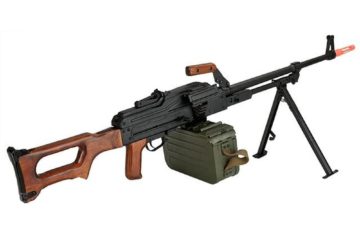
Can you make a remarkable sniper platform with a non-FSR compatible marker? Absolutely, and if you go the round ball route, check out the Tippmann A-5 Paintball Marker. This marker is very reliable and time-tested. This marker is also highly customizable and sold at a reasonable price. You can check Amazon.com for current pricing by clicking here
.
Many markers can and have and have made excellent paintball sniper markers. For simplicity, I will concentrate on the two markers as mentioned above.
Paintball Sniper Barrels:
The barrel is one of the most important components of your set up, so do your research on this. When choosing a barrel, you need to consider your platform. Let us assume that you have decided to go with an FSR compatible marker like the FS T15. Although theT15 is round ball and mag-fed compatible, why would you use a hopper?
A phenomenal barrel, which is compatible with the FS T15, is the First Strike/Lapco T15 Rifled Bore barrel. The barrel has unique rifling that works in conjunction with the FSR to give it a remarkable boost in accuracy. The barrel comes in 11.5” and 14.5 “models. There should not be a need to go above 14.5 inches, as it is doubtful that you would get any boost in accuracy by going longer.
Although, one advantage to going with a longer barrel is the ability to place your barrel in between brush and keep yourself hidden from view. The longer the barrel, the further back and out of sight, you can be.If you decide to go with a rifled barrel for the FSR, make sure that you clean your barrel after every 200 rounds to eliminate buildup. Unchecked, this buildup will affect your accuracy. For on the fly cleaning, consider the Planet Eclipse Paintball Barrel Maid Swab.
If you are building a paintball sniper marker from a non-FSR marker like the Tippmann A5, the Empire Apex 2 barrel is an excellent choice. The Apex barrel has a unique feature, which allows for left and right hook, drop shot and long flat trajectory shots with the twist of the barrel. The barrel tip has an adjustable ramp that gives the paintball a certain measure of backspin.
Because of the backspin caused by the barrel, you would need to stand up for longer shots because the round will drop upon exiting the barrel. After a considerable drop, the round will eventually level off into a flat trajectory. Shots from the prone position may not be feasible with this barrel fully ramped as the round will hit the ground in front of you.
Using a Hopper on a Paintball Sniper Marker:
If you choose to go with a hopper fed marker, make sure you choose a low-profile hopper like the Tippmann Low Profile Cyclone Hopper. This will streamline your marker set up and stay out of the way of any optics you may utilize. You want your sniper marker to be relatively flat as you will often be in the prone position. A large hopper can give your position away. Hoppers are also paintball magnets.
Optics for Paintball Sniper Markers:
Choosing an optic does not have to be so difficult, but there are so many choices in the market, the task may be daunting. Let’s take a look at some different options for optics and try to make your decision a little easier. In choosing an optic, you must balance practicality with aesthetics. Face it; some folks just want their marker to look cool, which is not wrong. Nevertheless, a cool looking useless optic is just that, useless.
Red Dot Sights:
A decent red dot sight with a large viewfinder will suffice for an effective range of up to 150 feet. Because of the lack of magnification, farther shots are difficult to make. I personally like red dot sights because of its simplicity of use and the target acquisition speed you can achieve. A red dot sight projects a dot which is a very simple to use targeting assist. Aimpoint makes an excellent red dot sight. If you cannot afford an Aimpoint, consider purchasing a clone like the Vortex Optics StrikeFire II
. The recoil of a paintball marker is not going to knock your zero off, so do not worry too much about buying name brand. You don’t have to break the bank to buy a decent red dot sight for paintball.
Holographic Sights:
Another great option is a holographic sight. A holographic sight uses laser-driven holographic technology to construct a 2 or 3-dimensional image of a reticle. The laser also illuminates the reticle. This technology allows the shooter to be able to view the reticle from any angle without losing accuracy. This can be incredibly useful while wearing a paintball mask. Your eye does not have to be directly behind the optic to take an accurate shot. The EOTech Holographic Weapon Sight is easily the best holographic sight in the market. In addition, Eotech has several night-vision compatible optics in the market, which will come in handy during night operations. Like the red dot sight, the effective range will be approximately 150 feet.
Crossbow Scopes:
A crossbow scope is engineered for a projectile that flies in an arc and is therefore uniquely suited for paintball. The Hawke XB30 Crossbow Scope is an excellent choice if you are going this route. The locking speed adjuster on the Hawke Crossbow can be set from 250 fps to 450 fps, which is well within acceptable ranges. You will need to utilize this scope with an adjustable riser like the First Strike Adjustable Riser. This riser has 19 vertical adjustable positions and instant elevation change.
Carmatech Supremacy FSR Optic:
Carmatech has created a First Strike calibrated optical system called the Carmatech Supremacy FSR Optical Scope Sight System. The Supremacy utilizes a wide-angle viewfinder with a paintball specific range finding drop-compensating reticle. The optic also has 1-6X variable zoom and red and green reticle illumination. If you choose to use this phenomenal optic, make sure that you chrono your marker to at-least 280 fps. You will also need an adjustable riser for this optic. This optic is not suitable for round balls. Visit Carmatech.net/supremacy for more information on this optic.
HHA Optimizers:
If you are willing to spend the money, you can also purchase an HHA Optimizer like the HHA Speed Dial Cross Bow Mount. The HHA Optimizer is an angular tilting device that works in conjunction with your optic, which accurately gauges the drop of an arrow shot from a crossbow. Because paintballs experience a similar drop during flight, one could see where an optimizer may bring your game up another level. The HHA Optimizer will work with the Hawke Crossbow sight or the Carmatech Supremacy.
If you utilize an optimizer with a fixed riser, you can expect an effective range of up to 180 feet. Using an adjustable riser with an optimizer will give your marker greater range and accuracy beyond 180 feet. I like to think of the optimizer as the smaller weight on the doctor’s office scale and the adjustable riser is the larger weight. You use the larger weight for an approximate number and the smaller weight dials it down to a more precise number.
Range Estimation:
Range estimation is very important for long range shooting. If you cannot estimate the exact range of your target, then using an adjustable riser or HHA Optimizer is futile. There are many range estimation techniques like the known-distance method or the bracketing method. I find that the easiest way to determine distance is to cheat; use a laser range finder. You can find them for about 90 Dollars or more on Amazon.com. Another straightforward way to determine range is by using google maps. You can print out a map of the field you are playing in and start to measure distances of common bunkers and buildings. The tricky part is determining the position of your target on the map.
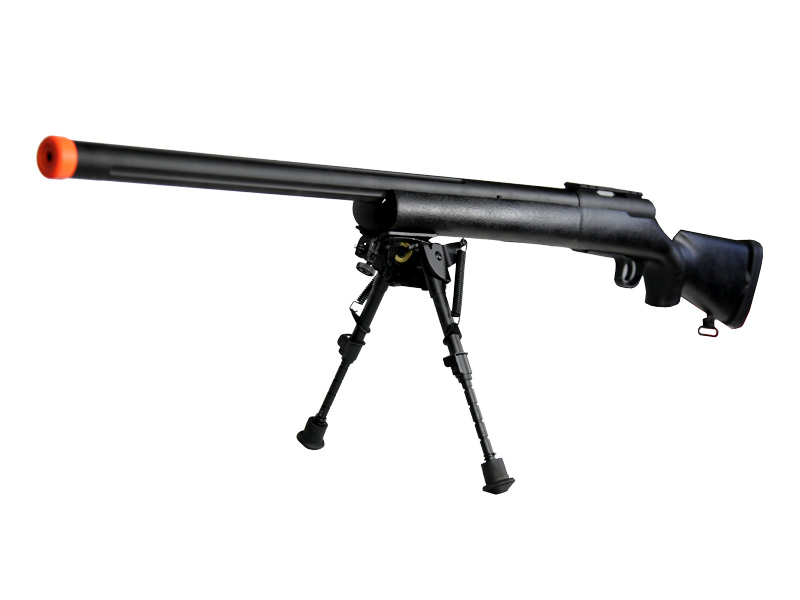
Bipod:
You will take most shots from the prone position, so purchasing a decent bi-pod will increase your stability without breaking the bank. Just search AR15 bipods in Amazon.com and see the many choices that you have. The CVLIFE 6- 9 Inches Tactical Rifle Bipod Adjustable Spring Return with Adapter is a good example and at 16 dollars, you cannot beat the price. The bipod will attach to the Picatinny rails on your FS T15.
The A5 does not come standard with a handguard with Picatinny rails that would allow the addition of a bipod. However, you can purchase the Tippmann A5 M4 Body Shroud made by Rockstar Tactical Systems. With the addition of this shroud, you can add the bipod and many other accessories. Some barrels have integrated Picatinny rails, so there is no need to purchase a shroud. You can also purchase a Clamp On Bipod, which clamps around your barrel.
C02 vs HPA:
Do not underestimate the importance of air regulation for a sniper marker platform. In long-distance shooting, the snipers’ job is to control as many factors as possible that affect shot accuracy. To achieve consistent accuracy, one must mitigate as many environmental, mechanical, and biological factors as possible. You want to take the shot the same way each time. To accomplish this, you need to eliminate as many of the variables that affect your precision.
For example, you can choose what type of round you use, what type of barrel, and when to pull the trigger. You cannot control the wind, but you can work with it. A factor that you can control is the propellant utilized for your marker. There are two types of propellants commonly used for markers, which are C02 and high-pressure air (HPA).
C02 or carbon dioxide is a liquid or gas depending on the ambient temperature. C02 is stored as a liquid in the C02 tank. Because markers utilize the gas form of C02, the liquid must first be converted to a gas. During cold and hot weather and changes in elevation, the rate of conversion will fluctuate causing changes in round velocity. You now must account for these fluctuations as another variable that will cause changes in your range and accuracy.
To mitigate this, utilize high-pressure air (HPA) instead of C02. HPA is stored in a constant gaseous state that will not cause fluctuations in velocity. Because of this, HPA will be the better choice for the paintball sniper. HPA tanks are more expensive than C02 tanks, but they are well worth the price. Ninja HPA Paintball Tank is an excellent option and worth a look.
Remote Line:
When lying in a prone position, it is advantageous to connect your tank via remote line and place your tank somewhere on your tactical vest. The best placement would be on your side or on your back. Doing so will keep the tank from bothering you while you lay in a prone position. Both the T15 and A5 have remote line options that are very easy to install. For the T15, First Strike makes a buffer tube remote line adapter that is super slick. Once installed, it will allow you to use any mil-spec buttstock with the T15. For the A5, there are many different remote adapters available; however, I like the Trinity Heavy Duty paintball Remote Line.
Paintball Quality:
The First Strike is the only company that makes FSR so that is an easy decision. If you decide to build a round-ball sniper marker, there are many options in the market. When choosing a round-ball for a sniper marker, you want one with good paint, which affects its flight characteristics. Thinner paint will create too much wobble during flight. You also want a round that will burst on impact at farther distances. Serum and Valken
are two of the best-rated paintballs around and are worth a look.
Proper Sling:
A decent sling will come in handy during long games. You can go with a single point, two point, or three-point sling. My personal favorite is the Magpul Two Point Sling. I run this sling on my patrol rifle and absolutely love it. To utilize a sling with the A5, you need to have a buttstock for the marker. Tippman makes a very affordable Tippman A5 collapsible buttstock. Visit Tippman.com for pricing.
You have to Hydrate:
I cannot stress this enough, have an appropriate amount of water on your person at all times. It is a good idea to stay away from energy drinks and alcohol the night before and begin to hydrate days before a Mil-Sim event. Carry a water bladder like a CamelBak and canteens for refills. Also, bring some chow, depending on the length of the mission. Remember, however, that cooking an MRE can bring attention to your position so opt for granola bars and the like while in a firing position.
Practice Often:
Whenever you put together your set up, it will do you no good to leave it in the closet to collect dust. You need to practice and do so often. Before shooting, get a feel for your marker. With the T15, practice magazine reloads and with the A5, practice hopper loads. You want to build muscle memory because, during times of stress, your motor skills will deteriorate.
Shoot and shoot often. Also, use the opportunity to sight in the optic that you choose. I suggest sighting your optic at 160 feet. Follow the manufacturer instructions for the optic that you choose. Also, practice with iron sights. Like any other form of technology, optics can and will fail. It’s just Murphy’ Law. Take the time to shoot your marker often. There is no substitute for practice.
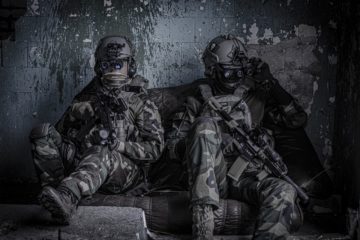
Paintball Sniper Camouflage Gear and Techniques:
I can remember playing woods-ball as a youngster. I remember how easy it was to spot the enemy. Players would wear a hodgepodge of different uniforms and some with bright colors. You could easily see them moving about, not even attempting to conceal themselves. This day in age, however, Mil-Sim has become a serious sport. Entire teams wear identical uniforms with some events employing a rank structure with enlisted standing at attention as officers brief them on their mission. Do not take camouflage lightly because the players out there sure do not.
As the definition states, a sniper is to shoot from a hiding place. The sniper will use cover and concealment to hide his position from his enemy. The sniper will often work deep in enemy territory, so if his position is compromised, he is in a heap of trouble. If he can successfully stay hidden while positioning himself, he can flank the enemy or get behind them. Besides cover and concealment, the sniper will utilize camouflage in his attempt to be unseen. If you attempt the tactics as mentioned above without an understanding of the art of camouflage, then be ready to take that long walk to the re-spawn point.
There are three methods of camouflage; hiding, blending, and deceiving. Hiding is the method of concealing the body behind an object, a formation, or vegetation and may also provide some measure of cover. To blend with your surroundings, match the colors on your uniform and gear, to the colors of your area of operation. You deceive your enemy by causing them make a false assumption as to your whereabouts.
Considerations for Camouflage Uniform Shirt and Pants:
The job of camouflage is to break up the familiar human shape and make it indistinguishable to the naked eye. Organizations, companies, and artist have taken great lengths to create patterns that accomplish this feat. There are so many patterns available in the market, so I cannot say that I have utilized or researched them all. I can only give my advice as to what I believe works the best.
When choosing a pattern, there are questions that you should ask yourself. First, does my team have a pattern that they use? If this is not the case, have you had a chance to look at the field? What colors are prominent? What time of year is it? All these factors may change the natural color pallet substantially.
I used to see a lot of Army Universal Camouflage Pattern (improperly but commonly known as ACU) in the field during games. I always saw those players first. If you use this pattern in the woods, consider rubbing dirt or sand from the location on them to match the terrain. The Universal pattern is most effective in heavy urban terrain with lots of concrete.
Woodland Spring/Summer Patterns:
Patterns like the old Woodland pattern are great for heavily vegetated woodlands during spring and summer. They are also very inexpensive to buy. The ARMY OCP is a strong choice for the same time of year. The Mandrake pattern by Kryptec is an excellent choice as well, but my favorite pattern for woodland terrain in the spring and summer is the A-Tacs FG. To me this pattern is like a cloaking device; it’s almost magic.ZAPT Tactical
sells an affordable shirt and trouser set for many of the patterns discussed in this article.
Woodland Fall/Winter Patterns:
During winter and fall, the browns and tans become more prominent as the foliage dies and reveals the forest floor. For this type of environment, the Multicam pattern shines. My personal favorite for the fall and winter in a woodland environment is the A-Tacs AU pattern. The A-Tacs AU pattern is also great in an urban environment with cement and light colors.
Moreover, if you are in a snowy environment, the A-Tacs ATX pattern is the best that money can buy. Yes, I love the A-Tacs patterns; they are phenomenal. I have not seen anything that works quite like it, especially the A-Tacs FG pattern. A-Tacs has come out with an intermediate pattern called the A-Tacs IX. This pattern is a blend of the AU and FG patterns. The A-Tacs IX is supposed to be a good multipurpose pattern. I have not personally seen it, but the pictures look great! Visit A-Tacs.com for more information.
Disguise the Noggin:
If you are wearing a helmet during operations, consider purchasing the helmet cover that matches the rest of your camouflage. Wearing a helmet is a good thing in Mil-Sim. They offer extra protection, mounting options for Go-pros and night vision goggles, and they just look so cool. However, they also cause an issue when trying to keep hidden from the enemy. The shape of a helmet is very recognizable to the naked eye. The helmet looks like a big round head. However, for every problem, there is a solution.
If you look at the helmet cover, you will notice tiny slits cut out. You can add foliage and material into the slits to help break up the shape of the helmet. When you get to your field, grab some of the local foliage and place it in these slits. Now, do not overdo this, you are not making a bouquet. If you are going to be in an over-watch position for some time, consider replacing the foliage with fresher ones from your hide. This will help it match your surrounding perfectly. You can also cut a piece of camo netting just slightly larger than the helmet, and affix it onto the helmet with a ranger band. Just make sure to keep the netting out of your field of view.
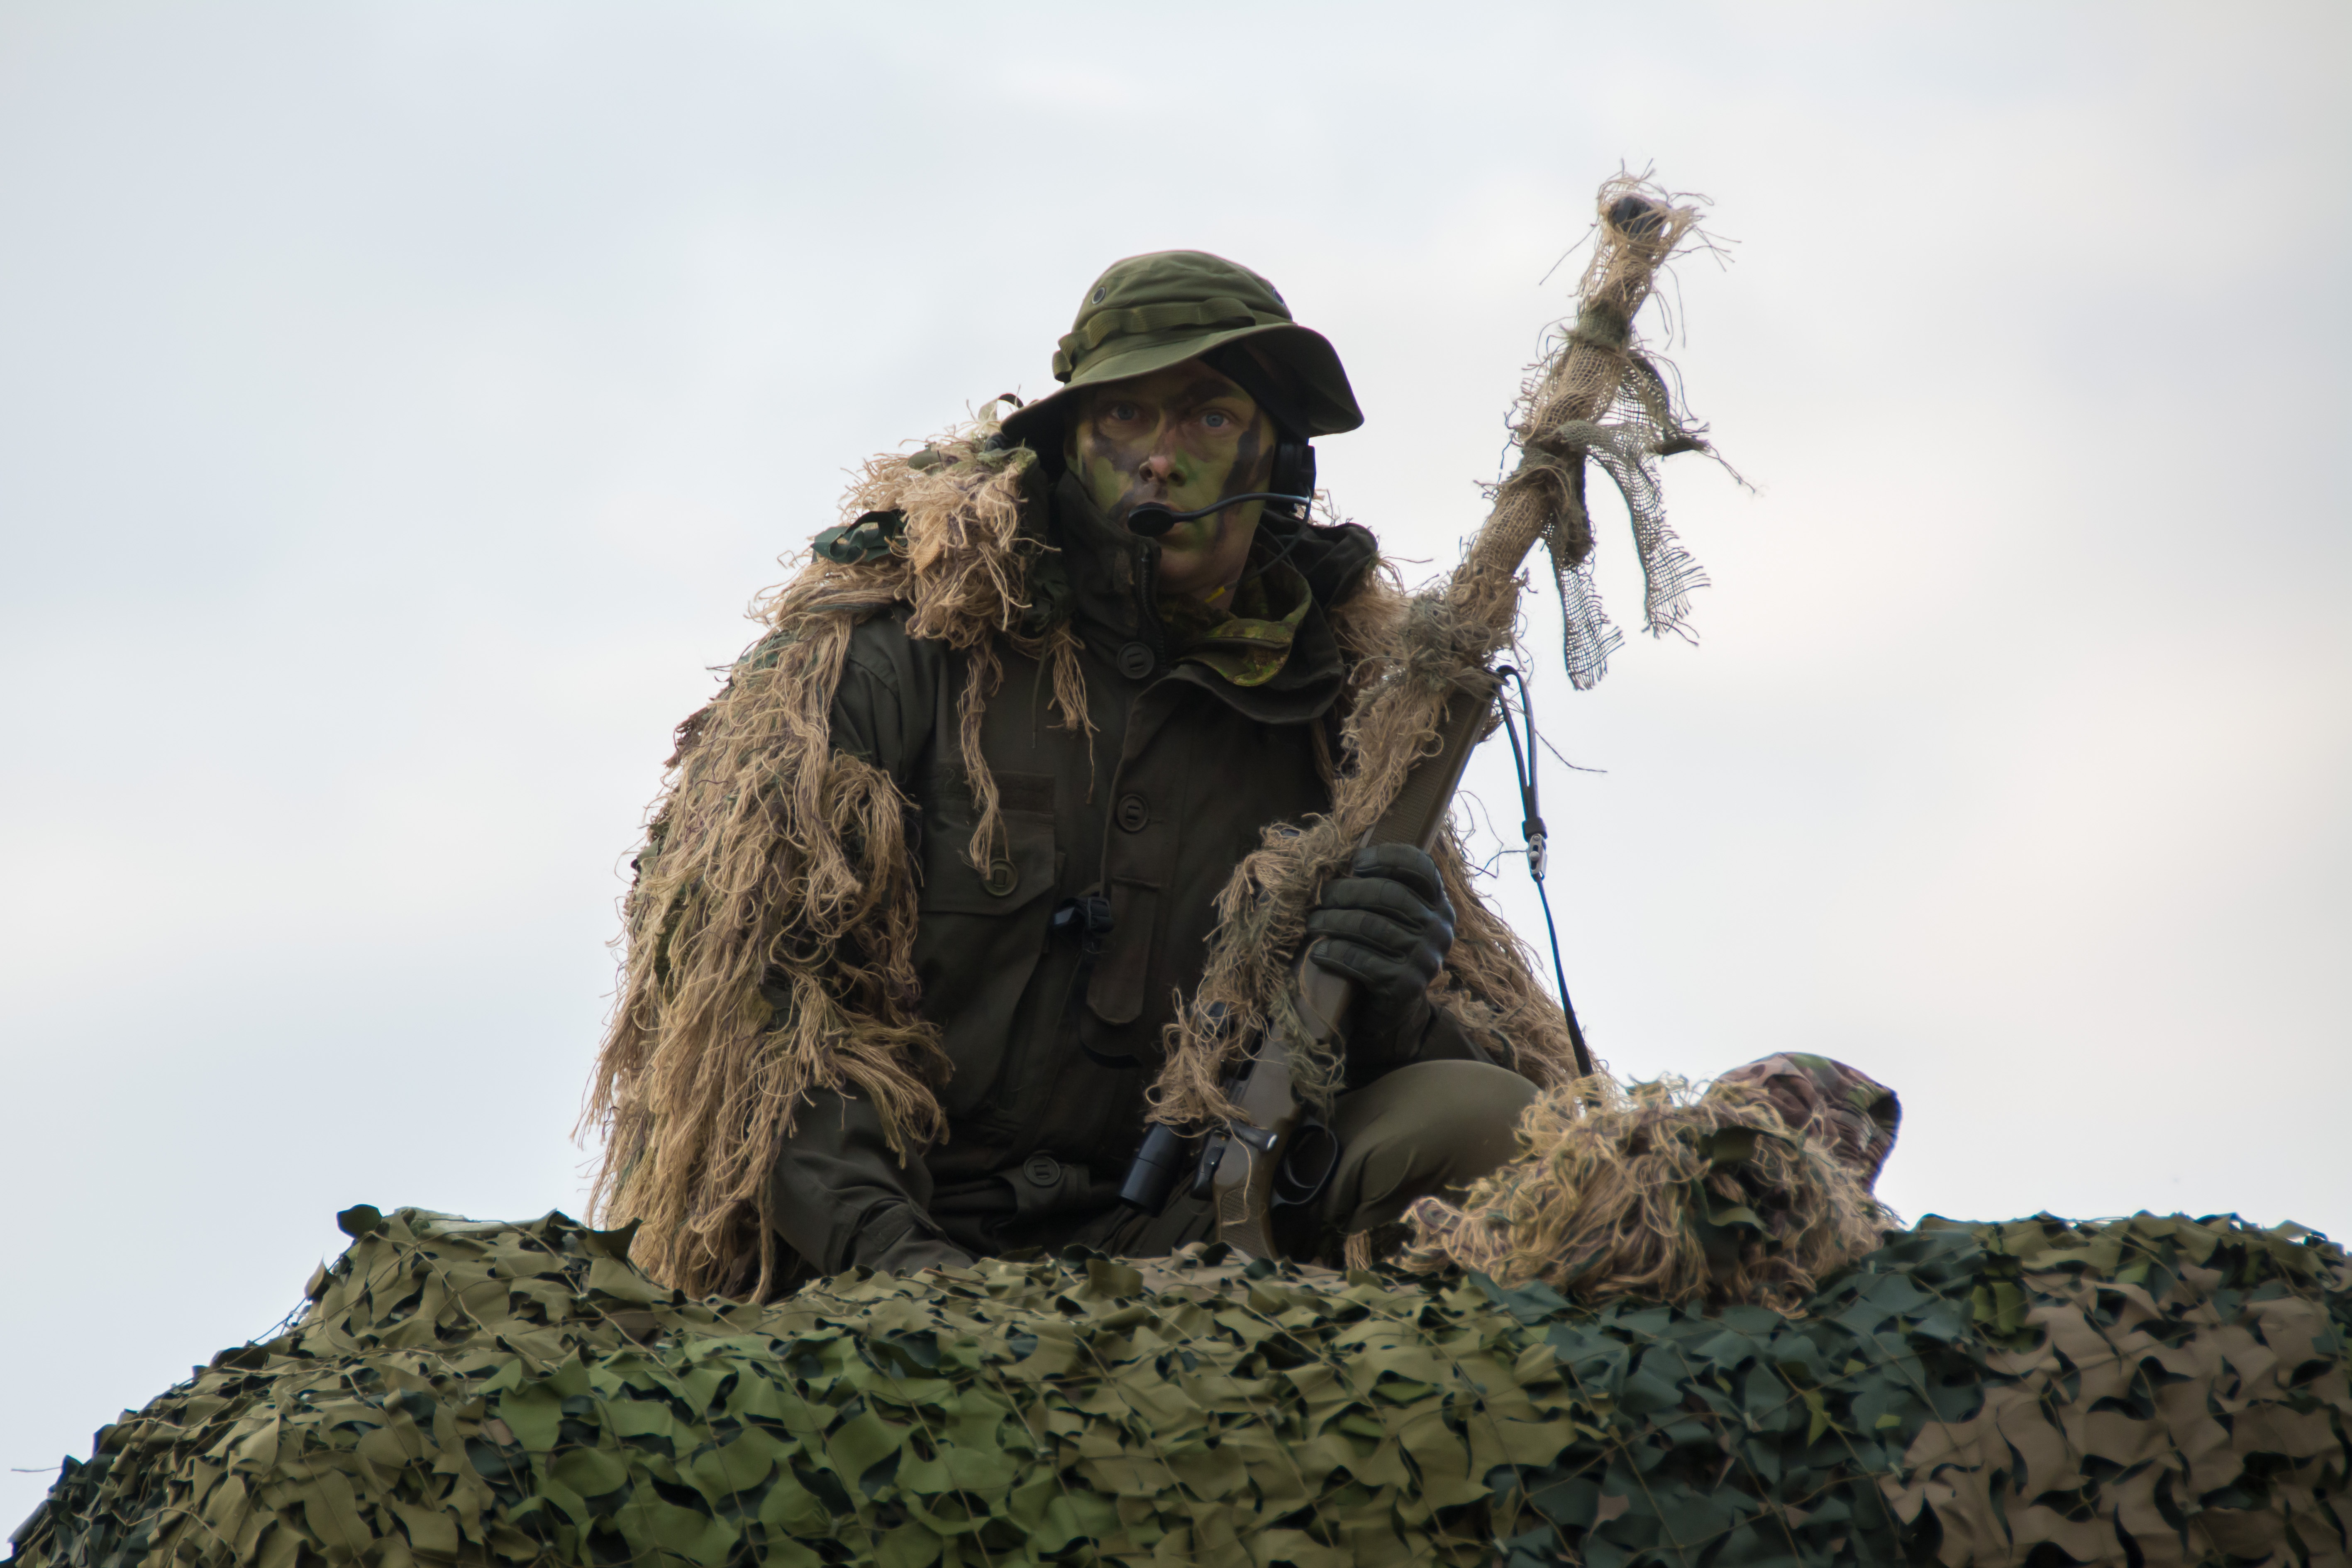
Many snipers opt to go with a boonie hat instead. The boonie hat has a wrinkled brim, which will break up the shape of the head. You can purchase the boonie hat in the patterns that match the rest of your camo. They are also more comfortable to wear with a paintball mask.
Paintball Mask for the Paintball Sniper:
A dark-colored paintball mask with a large lens will do just fine. You can purchase many popular masks in camouflage patterns. It is important to purchase a mask that is comfortable and breathable. A sniper will lie in prone for a long time, so you want to be comfortable. I like the Empire Helix in Olive Green. It’s inexpensive, comfortable, and looks great. The mask also utilizes a thermal lens to assist with fogging. You can also use an anti-fog spray to double your efforts in combating this annoying problem.
Cover your Skin:
The paintball mask should do a decent job of covering most of your face. You can purchase the mask in the same or similar pattern to the rest of your camo. Even with a mask and hat, your neck is going to be exposed. Consider using a shemagh to cover it. A shemaugh is a traditional Middle Eastern headdress fashioned from a square piece of cloth. Many members of the military, including myself, have used the shemaugh as a wrap for the head and neck. If you do not want to utilize a wrap like a shemaugh, you can use camouflage paint to cover your skin. It is best to have someone else apply the paint on you. You do not want to miss any spots.
Wear gloves as exposed hands will give your position away very quickly. I only buy Mechanix brand gloves. Are they the best? I don’t know maybe, but for the price, you can’t beat the fit and quality. They also make them in several different patterns like Coyote and Multicam.
Also, wear a dark-colored undershirt and button up your shirt, or blouse all the way. An exposed bright colored shirt makes an excellent target. Some players wear their sleeves rolled up. I know it’s comfortable and some great snipers do this, but my advice is to cover it all up. Skin tone will give you away, and even if you are darker skinned, sweat will make you shine. This brings me to my next section.
Shiny Objects Give Away Your Position:
Eliminate everything that will reflect light. I know that the paintball mask lens is shiny. The boonie hat will help deflect some of the light. In addition, exposed skin will shine when it is sweaty. Flashlights, plastic bags, watches; they all will reflect light. Just be cognizant of these things. In addition, your optics will reflect sunlight. You can mitigate this shine by covering the lens with a piece of pantyhose material. Some manufacturers sell anti-reflection devices for their optic as well.
Camouflaging your Paintball Marker:
Nowadays, the shape of a rifle is very recognizable. What good is it to have the best camouflage but have a shiny black marker?
Elastic Band Method:
One of the cheapest ways of camouflaging your gun is to take elastic band, tie strips of burlap or other material on it, and wrap the band around your marker. Before doing this, first, wrap the empty band around your marker to measure the length that you need. Then, cut to size and tie loops on both ends of the elastic band. Next, attach the pieces of fabric on the elastic band. Use natural colors for the strips. Begin wrapping the marker by placing the first loop around the barrel. Make sure not to cover anything that requires mechanical movement, like a charging handle. When you get to the end of the marker, wrap it around the buttstock.
Camo Tape Method:
There is also camo tape that will do the job. You can purchase this tape in the pattern of your choice and wrap it around your marker. Just make sure that the tap does not inhibit any mechanical functions of the marker. The Camouflage Tape is also reusable and quite affordable. AIRSSON makes a Roll Camouflage Tape which very inexpensive and highly rated. Roll the camo tape around the barrel to hide its color and outline.
Spray Paint Method:
You can also paint your own marker with Krylon camouflage paint. Use three or more colors and attempt to match the pattern of your favorite camouflage. Use stencil paper and cut out shapes that match your camouflage. You can also use a burlap material to overlay over the marker and spay to create patterns. If you search, “painting your paintball marker,” or “painting your rifle,” on Youtube.com, you will find many videos on how to accomplish this.
Hydro-Dip Method:
The most expensive way to camouflage your marker is to hydro dip it. Hydrographic printing, commonly called “hydro-dip,” is a method of applying a printed design on a three-dimensional object. The process has been around since the 80’s. Although the process can be rather expensive, the results are just beautiful. This is expensive, so if you do this, make sure you make the correct choice of pattern.
Using a Sniper Veil:
A sniper veil is a sheet of see-through fabric that you can use to cover your head and your marker when sitting in a stationary position. This is NOT a ghillie suit but works similarly as you can place foliage within the veil to match your surroundings. This is a very effective way of hiding so I recommend having a sniper veil in your pack. You can purchase a sniper veil on Amazon.com for very reasonable prices. If you so choose, you can make your own sniper veil with some cotton mesh netting, spray paint, and natural or artificial foliage.
Boot considerations for Paintball Sniping:
Stay away from shiny black boots. They can be black but take away the shine by rubbing dirt on them. Also, stay away from brightly colored boots or shoes. A pair of tan boots will work just fine, and many retailers sell camouflage patterned combat boots. When choosing a boot, I recommend that it is waterproof. The Rocky S2V GORE-TEX boot is a phenomenal waterproof boot. I know many members of the military that have purchased this boot and they love them.
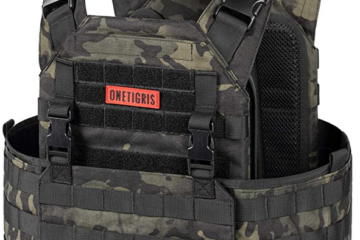
Gear consideration for Paintball Sniping:
I have seen many folks with excellent camouflage and then mess it all up with black tactical gear. Call me a perfectionist, but this just irks me! Make sure your gear color at-least closely matches your camo. When choosing your gear, think about gear placement. Realize that for a good portion of a mission, you will be laying on your belly. Placing all your mag pouches up front may not be advantageous.
Also, do not get anything too bulky when playing as a sniper. You want to remain flexible and comfortable. For that reason, I like the Condor Elite Tactical Vest. This vest is super lightweight and comfortable. If you want to get the color just right, spray paint it to match the rest of the gear. If you are going to carry a pack, consider buying a pack cover in the same camo pattern as the rest of your gear. Fire Force
makes an affordable pack cover in several different patterns including Multicam, Universal, and Woodland among others. The rule of thumb when it comes to getting your gear together is this; no bright colors and consider your environment.
Tactics for Paintball Sniping:
You have the best sniper marker setup; you have effective camouflage, but the enemy eliminates you before you take the shot off. What is going on? Most players spend most of their time on perfecting their camouflage. However, movement and noise will most often give your position away. Perfecting the tactics required to be an effective paintball sniper takes time and patience. Let’s first discuss the many roles that you may be required to play as a designated sniper.
Paintball Sniper Roles:
Common roles for paintball snipers are recon, overwatch, blocking action, and target elimination.
Sniper Recon:
Reconnaissance missions are of utmost importance to any team. Because of the sniper’s ability to place himself close to the enemy, they can relay actionable intelligence like patrols, numbers, weapons, and high-value targets to leadership. The sniper can also warn his teammates of any imminent ambushes. If correctly hidden, the sniper has placed himself in a tactical position to thwart the attack. Snipers and sniper teams utilized in this role will place a special emphasis on stealth and the ability to determine a proper hide spot. With the intelligence gained from the sniper, leaders can begin to coordinate attacks and counter-attacks. Oftentimes, the recon sniper will never take a shot. He is far more valuable as a forward observer in this role.
Sniper Overwatch:
A sniper will often be utilized in a support role such as overwatch. When operating as overwatch, the sniper’s job is to protect a main attacking force from unseen dangers. The sniper is to place themselves in a position, which gives him an unobstructed view of the entire battlefield. He is to remain in a covered and concealed position and is to eliminate any enemy that can potentially stop the advancing force. Oftentimes, the high ground like a ridge, tower, or a nearby roof, will provide an excellent field of view and firing position. Remember, however, that the enemy will know this too, so be creative when determining your overwatch position.
Sniper Blocking Action:
When utilized as a blocking force, the sniper has concealed himself behind cover in a friendly occupied position. Their job is to stop advancing forces that are attempting to overtake your position. In this role, the sniper is a force multiplier and psychological deterrent to the attacking force.
Target Elimination and Identifying High-Value Targets:
In this role, your role is to take out any high-value targets (HVT) as determined by leadership. HVT’s can be officers, communications, medics, or anyone deemed an HVT by command. The sniper must have the ability to place himself in a hiding position, well behind enemy territory, and pick out the HVT. Sometimes the target is a specific person, so if images are available, study them carefully. Remember the gear, camo, and patches utilized by this individual because the paintball mask will hide the face.
Also, learn to identify other targets of opportunity by their uniform, gear, or actions. Some games have predetermined HVTs. Pay close attention to this information, as it is key to a successful mission. Some common HVT’s are snipers, scouts, officers, non-commissioned officers, vehicle drivers, communications personnel, and weapons crews.
The Importance of Cover and Concealment:
Cover and concealment are not synonymous. Cover is natural or artificial protection from enemy fire. Anything, that would stop a bullet, or this instance, a paintball, will provide cover. There is natural cover like rocks, trees, and artificial cover like walls and fighting positions. If properly utilized, even a small depression in the ground may provide cover. As the sniper stalks, he should always be looking for cover. If your position is compromised, you want to be able to get to the cover that you already saw, instead of look for cover while you are being shot at.
Concealment is natural or artificial protection from enemy observation. Concealment will generally not stop a bullet, although some concealment may stop a paintball. Tall grass and bushes may provide some concealment. You may also create artificial concealment with the camouflage you use and your ability to incorporate natural materials into it.
Sniper Target Indicators:
A sniper will use target indicators to detect enemy positions. Target indicators will also give away your position to the enemy. It is therefore of utmost importance to understand these indicators and know how to minimize them. A target indicator is anything an individual does or does not do that could result in his detection. Sound, movement, disturbance of wildlife, and odor are common target indicators that could give away your position.
Sound Discipline for Snipers:
Enemy patrols can pick up on talking and noise made by gear, especially during the hours of darkness. When stalking, it is imperative that you study your next move to determine if placing a foot or knee would cause any noise. Before a mission, be mindful of gear and other items that cause too much noise. Things like keys, loose change, watch, gear, boots, cell phones, and other electronic devices may cause unwanted noise. Lose the keys and change; just leave it behind. If you need keys with you, tape them together with duct tape, or keep single keys in separate pockets. Your watch may have an alarm that you need to silence. You could also purchase a watch with a vibrating alarm, like the Timex Expedition Vibe Shock Watch.
Your gear also may be noisy. Before going out on a stalk, do a jump test by jumping up and down and noting the sound created by your gear. If you determine that something makes noise, consider taping it down, or moving the item to another pouch. Better yet, determine if you really need that item. Boots may make noise in some environments like concrete or wooden buildings. Walking heel to toe can also eliminate some noise made by boots. The problems caused by cell phones are obvious. Place them on silent and dim the screen as much as you can. If you do not need it, leave it. Cover camera lights with duct tape, as a tiny blinking red light is very noticeable at night.
Movement:
Movement is most noticeable in the daytime, so keep your movements slow and deliberate. Look at the way the trees sway and attempt to mimic this as you move. Chameleon lizards and praying mantis utilize this technique in the wild to disguise themselves from predator and prey. When moving, always assume that the area is under observation. Also, do not make sudden or jerky movements and always consider what your movements due to the environment. We will discuss this later.
Disturbance of Wildlife:
Animal behavior may alert the enemy to your presence. You all have seen movies, where a large group of birds suddenly flies away, alerting an observation post of the presence of the enemy. This is rooted in reality. Domestic animals like dogs are probably the biggest problem that a sniper would face. You probably will not run into livestock or even dogs in a Mil-Sim event, but you will run into birds. So, if you cause a bird or two to fly off, do not panic, assess your situation, and move from your position if you need to.
Odor:
Smoking, insect repellant, cooking, deodorants, aftershave, and more are scents that could bring attention to your position. Smoking will probably draw the most attention to you as the odor is strong and it is a visible indicator. If you have to keep one, keep the repellant. You are going to need it while crawling around in the woods.
Stalking Tactics for the Paintball Sniper:
Stalking is the movement of a sniper from a safe position to a firing position or hide. He must be able to observe the enemy while being undetected by them. A sniper must always assume that the enemy will spot him at any time. He must, therefore, keep his movements slow and deliberate. As the saying goes, “slow is fast and fast is dead.”
When moving from position to position, plan your movements before you make them. Stop, look, and listen after every movement. Mask the sound that your movements make by waiting for loud ambient noises to make your move. For example, a vehicle moving nearby will cause enough noise that could mask any noise that your movements would make.
Sniper Crawl Techniques:
A sniper should be well versed in crawl techniques like the sniper low crawl, the medium crawl, the high crawl, the hands-and-knees crawl, and walking.
The sniper low crawl is used when you are very close the enemy, there is little concealment, or when positioning yourself to fire. Accomplish the sniper low crawl by lying flat on the ground with your legs together. Your feet are flat and facing outwards. Make sure your marker is held by the sling and taut against your forearm. With your arms flat and outstretched ahead, pull yourself forward with your fingers while simultaneously pushing with your toes.
The medium crawl looks like the low crawl they taught you in boot camp. Use the medium crawl when concealment is scarce but you need to move faster than the sniper low crawl allows. Accomplish the medium crawl by lying flat on the ground with your legs spread shoulder-width apart. Your feet should be flat and facing outwards. Make sure that you hold your marker by the sling and taut against your forearm. With your arms flat and outstretched ahead, pull yourself forward with your arms while simultaneously pushing with your legs.
Utilize the high crawl when concealment is scarce but high enough to be able to raise your head. When attempting the high crawl, cradle your marker in your arms and support your body with your elbows and knees. With your body slightly raised, you are to move forward on your elbows and knees.
Utilize the hands-and-knees crawl when concealment is not available, and you need to move faster than the medium crawl. Support your body by the knees and hand. Your marker should be carried in the other hand, with your optic tucked tightly in your armpit.
Walk when the enemy is not close, concealment is available, and speed is required. When walking, crouch slightly with body bent forward and knees bent. Keep your marker in line and close to your body, with the muzzle pointing downward.
Common Mistakes made by Paintball Snipers on a Stalk:
Several common mistakes could give your position away during the stalk. Those are overhead movement, parallel movement, turkey necking, and tree cancer.
Overhead Movement:
Overhead movement occurs when you cause the movement of branches, bushes, and other vegetation as you crawl by them. The enemy may be able to pinpoint your position by the movement of the vegetation, especially on non-windy days. When crawling through brush, be cognizant of the potential overhead movement that you would cause. Always stop and think about your next movement.
Parallel Movement:
Parallel movement, in relation to the target, is very discernable to the naked eye. The eye will fixate on something moving across your field of view very quickly. It is better to move towards your target. When negotiating your path, try to determine if there are other targets in the area. If you focus on one target and miss the enemy personnel to your left or right, they may see your parallel movement in relation to their position.
Turkey Necking:
Turkey necking occurs when the sniper peaks their head over brush in an attempt to observe the target. When you are close to your target, you must fight the urge to do this. Attempt to locate a different position that would give you a better vantage point, determine a systematic process of getting there, and after movement, stop and reevaluate.
Tree Cancer:
When a sniper lays close to the base of the tree in a ghillie suit, from a distance it looks like a growth. They call this “tree cancer,” for obvious reasons. From a distance, this odd “growth” may bring unwanted attention to your position. Consider looking for a different position.
Sniper Firing Position or Hide Selection:
Constructing a sniper hide or sniper firing position is a very important task for obvious reasons. This task requires skill as you must be able to take advantage of the terrain while deceiving the enemy into a false sense of safety. The process starts when you first receive your mission. Use google maps satellite feature and topographical maps to determine the optimal placement of a firing position.
When choosing a firing position consider target observation, concealment, cover around your position, distance, and possible obstacles. Avoid locations that are too obvious, like the very top of a terrain feature or building. Also, avoid being close to isolated objects, like a single tree on a hill. Avoid building a hide site or firing position on or near a bend in roads, trails or streams, and avoid populated areas. Choose a location that is not an obvious location for a sniper. Instead, look for downed logs, rubble, and deep shadows. If firing from the inside of a building, do not place the barrel of your marker outside of the window. Position yourself a few feet behind the window, away from any sunlight that may give away your position.
When choosing a sniper hide, choose several possible positions. Your intelligence may not be the most up to date, so it is always good to have contingencies. During planning, also select an objective rally point (ORP.) An ORP is a location where the sniper conducts recon of the possible firing position to determine its viability. The ORP should provide cover and concealment, and be located as close to the potential position as possible.
When you make it to the ORP, you should stop, look, and listen. Avoid making noise as you determine the best route to the firing position. Once you have carefully occupied your firing position, establish an escape route. Also, look for cover nearby, in case you come under heavy fire. From the position, begin construction and preparation. Begin to build your position during times of limited visibility. During a Mil-Sim game, you will most likely utilize a hasty position, as positions that are more permanent could take days to build.
Hasty Firing Position:
Utilize a hasty position when you have spotted the enemy, and need to take immediate action. The hasty position requires no construction so you would use what is available for cover and concealment. This position is generally occupied for a short period. You will not have much freedom of movement in a hasty position, as any movement would require careful consideration and planning. The position will also offer no cover from indirect fire. When in a hasty position, you will rely heavily on your camouflage.
Expedient Firing Position:
The expedient position requires minor construction and is utilized when you need to remain in place for longer than the time a hasty position can provide. The expedient position lowers your silhouette but allows you to fire at and observe your target. First, dig a hole in the ground just large enough for you and your equipment. You can push and hide any dug up soil under logs, or utilize it to create front cover.
This position will conceal most of your body and gear, and provide a measure of protection against direct fire. This position does not allow much freedom of movement, besides the ability to move your head up and down without bringing unwanted attention. Because your head and optic will be exposed for the shot, you will rely heavily on camouflage. An expedient hide can take 1-3 hours to construct.
Two other positions are the belly hide and the semi-permanent hide. I will not discuss these positions, as they require several hours to construct and are not feasible for most Mil-Sim events. If you are interested in further research on the subject, look at the Sniper Training FM 23-10, available online at Amazon.com. What I have provided above is a good start; however, further research is always required for perfecting a craft.
Shot Placement for the Paintball Sniper:
When shooting at your target, aim at the upper extremities and the head. Also, try to wait for the target to turn away from you before taking the shot. If they see the round coming, they may give your position away to teammates. Also, remember that paintballs from certain distances may not break, so be ready for a follow-up shot. When positioning yourself for a shot, consider tree branches and foliage that may prevent your round from hitting your target. Reposition yourself for a better vantage point. Once you have taken a shot or two from a hasty position, consider moving and repositioning yourself somewhere else.
In this article, I have only begun to dig into the surface of this intriguing aspect of paintball. This article should be a solid foundation for the beginner sniper, but do your own research on the subject. Becoming a paintball sniper takes time and dedication. Go out there, experiment with markers, ask more questions, and most importantly, practice shooting.